Gluten-free, Main Entrees, Soups, Vegan

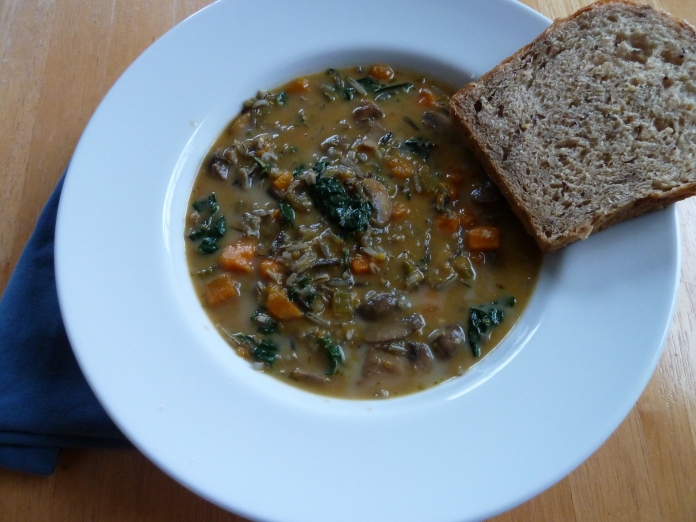
Creamy Wild Rice Mushroom Soup

P1050030

Serves 6-8

Ingredients

2 cups wild rice

1 Tbs ghee (olive oil if vegan)

1 onion, diced

1/2-1 tsp himalayan salt (based on preference)

1/2 tsp freshly cracked pepper

2 sweet potatoes, cubed

3 celery stalks, small dice

8 cups crimini mushrooms, thinly sliced

6-8 garlic cloves, pressed in garlic press

1/2 cup Sauvignon Blanc wine

2 sprigs fresh rosemary, remove from stem and mince

8-10 cups filtered water (depends on how much broth you prefer)

4 Tbs vegetable bouillon, (Better Than Bouillon brand is a must)

3 cups Dino kale, stem removed & chopped

1/2 cup half & half (*skip if vegan, still delicious without)

Directions

1. Prepare wild rice by first rinsing thoroughly in a fine mesh strainer (*important step). Place rinsed wild rice in a large saucepan and cover with 6-8 cups filtered water. Place lid on and bring to a boil. Reduce heat to simmer and cook for about 25 minutes (depends on the wild rice you purchased-some can take 50 minutes). Set aside until ready to add to the finished soup.

2. Meanwhile, in a large dutch oven, saute the onion in ghee over medium heat until tender, about 6-8 minutes (sprinkle with salt & pepper).

3. Add in sweet potatoes and celery and saute for another 6-8 minutes.

4. Next, add in mushrooms and cook until tender, about 6-8 minutes. (Mushrooms will release water which flavors the soup)

5. Saute the garlic for 1-2 minutes.

6. Add the Sauvignon Blanc wine, (be sure to scrape up any browned bits), and cook for 2 minutes.

7. Pour in filtered water, rosemary, and vegetable bouillon and bring to a boil (uncovered-it will reduce down slightly). Allow soup to simmer 30-60 minutes to allow the flavors to develop. (*you can cut down the time, but it’s worth the wait)

8. Right before serving stir in the kale, cooked wild rice, and half & half.

 I noticed on Pinterest there were a lot of wild rice soup recipes, so I thought I would try to make one that was healthier, loaded with lots of veggies, and had high quality ingredients. I was pleasantly surprised with how this soup turned out. The Sauvignon Blanc imparted a wonderful flavor that paired well with the mushroom broth that was released from the large amount of sautéed mushrooms. I have made this recipe several times and I added even more mushrooms and I think it made the flavor even better, so don’t be shy with the mushrooms. I highly recommend slicing them thinly because more of their flavors are released and it’s more desirable when you are eating the soup. Another great thing about this soup is that wild rice is actually a complete protein so you have a well-rounded meal. I brought this soup to my annual girls weekend and it was a hit. I packed the soup in large mason jars (easy for traveling) and purchased an amazing loaf of bread from my favorite local bakery to serve along side. It was nice to have a balanced meal that was easy to warm up and enjoy. 

Standard
Gluten-free, Main Entrees, Soups, Vegan

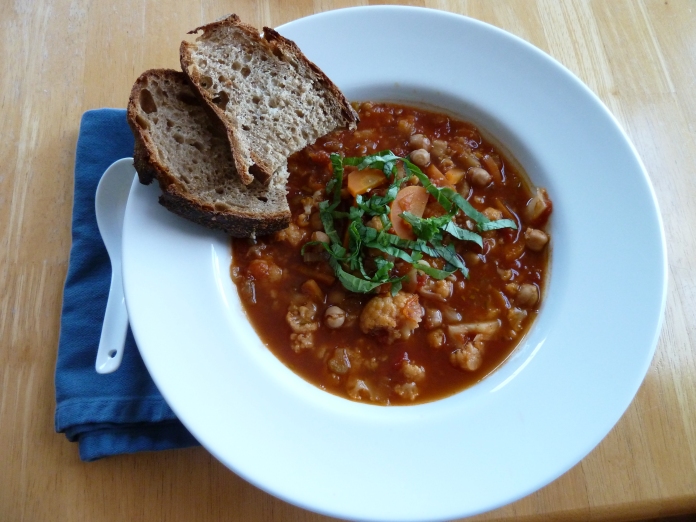
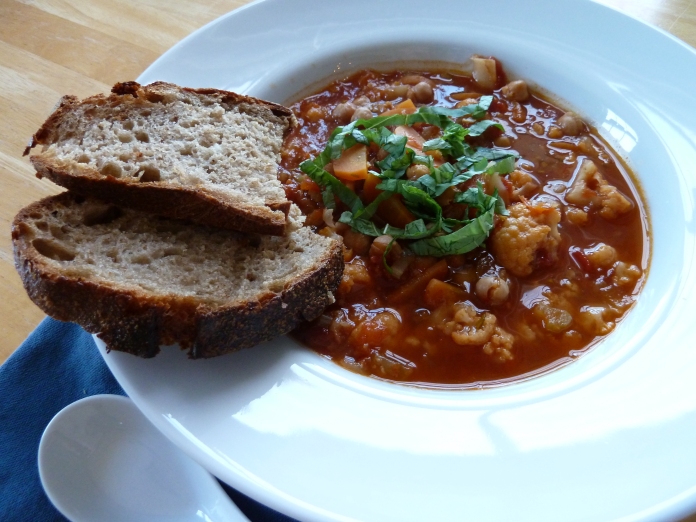
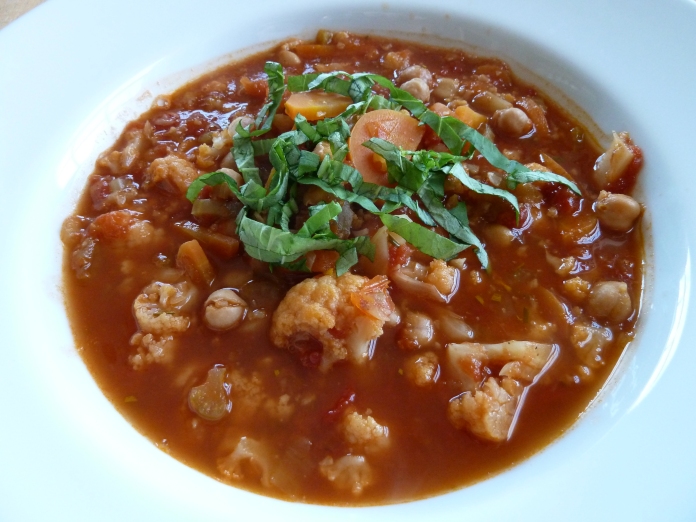
Chickpea Cauliflower Minestrone

P1050014

P1050015

P1050003

Adapted from Vegetarian Times

Serves 6-8

Ingredients

  • 1 Tbs ghee (or olive oil if vegan)
  • 1 onion, chopped
  • 4-6 cloves garlic, pressed with garlic press
  • 3 large carrots, thinly sliced
  • 3 stalks celery, thinly sliced
  • 1 head of cauliflower, cut into small florets
  • 1 26.46-oz. box of (Pomi brand) chopped tomatoes
  • 2 sprigs fresh rosemary, remove stems and mince
  • 2 cans chickpeas, rinsed and drained
  • 6-8 cups filtered water (*add water based on how much broth you prefer)
  • 2 1/2 Tbs vegetable bouillon (Better than Bouillon brand)
  • 1/2 cup chopped fresh basil (garnish)

Directions

1. In a large Dutch oven, heat ghee over medium heat. Add onions and saute until tender and golden.

2. Add in carrots, celery, and cauliflower. Saute for about 10 minutes until tender. Add in garlic and saute for 1-2 minutes.

3. Add in tomatoes, chickpeas, water, bouillon, and rosemary. With a lid on bring to a boil and then reduce to simmer. Allow about 30-60 minutes of simmering for the flavors to develop.

4. Serve with a garnish of fresh basil.

I was first inspired to make this recipe after reviewing a chickpea minestrone recipe from Vegetarian Times. I knew with a few adaptations I would be able to make a healthy light recipe that I have been craving after the heavy rich holiday food. I decided I wanted to try cauliflower in a soup because it is one of my favorite vegetables and I thought it would be great at taking the place of the pasta in the original recipe. Then the recipe would be gluten-free and the nutrition level would be increased. Well, it turned out that the cauliflower took center-stage and added a comfort element that you would have gotten from the pasta. The cauliflower became so tender after cooking in the broth for that long.

To reduce more inflammatory ingredients I decided to cut out the parmesan and it wasn’t even missed because the soup was so flavorful it didn’t need the cheese. I do love cheese, but sometimes I think a recipe is flavorful enough that it doesn’t need it. I also decided to use fresh rosemary instead of thyme because I prefer the flavor. Also, make sure you always use fresh rosemary because dried rosemary is hard and sharp and doesn’t soften in the recipe, so it makes it an unpleasant experience. If you only have dried rosemary make sure you mince it very fine so it’s not as sharp.

I specified the brand of tomatoes I purchased because I think it is important to note that it is recommended to not purchase tomatoes in a can because of their acidity reacts with the BPA lined in the cans (linked to many health issues). Fortunately, the Co-op I shop at has tomatoes in a carton or glass jars. I really liked the addition of tomatoes in this recipe because they add such a fresh light flavor. I have been loving tomato-based soups lately. 

Feel free to add more garlic, onions, or veggies that you prefer. The great thing about soup is you can get really creative with the ingredients and you can pack a lot of nutrition into one bite.

Standard
Appetizers, Gluten-free, Main Entrees, Salad, Vegan

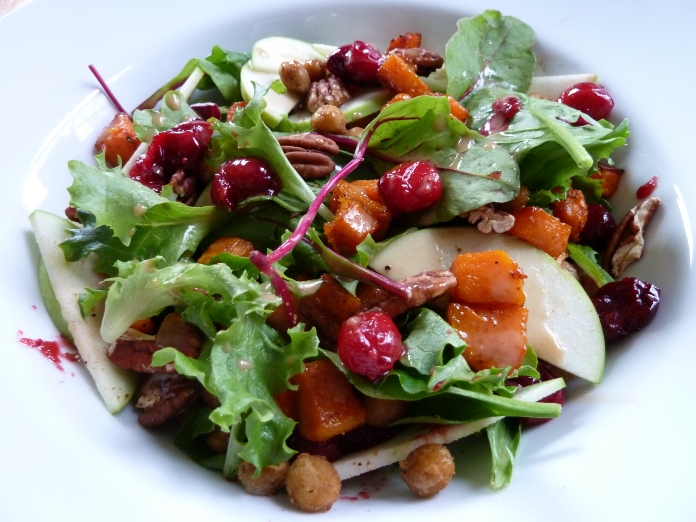
Winter Maple Salad

P1040983

P1040959

P1040969

P1040974

P1040972

Serves 4-6

Ingredients

10-12 cups mixed salad greens, washed & spun dry

1 butternut squash, peeled & diced (about 3-4 cups)

1/2 tsp cinnamon

2 cans chickpeas, drained & rinsed

1 tsp cumin

1 tsp garlic salt

2 cups fresh or frozen cranberries

2 Tbs balsamic vinegar

2 Tbs maple syrup

1/2-3/4 cup pecans

2 granny smith apples, thinly sliced

Olive oil/salt & pepper as needed

Creamy Maple Dressing

1 cup vegan mayo (preferably “Just Mayo”-non-soy)

1/3  cup maple syrup, grade B (richer flavor)

1/4-1/3 cup balsamic vinegar

2-3 Tbs dijon mustard (based on preference for tanginess)

1/2 tsp salt

1/4 tsp pepper

Directions

1. Preheat oven to 425 degrees.

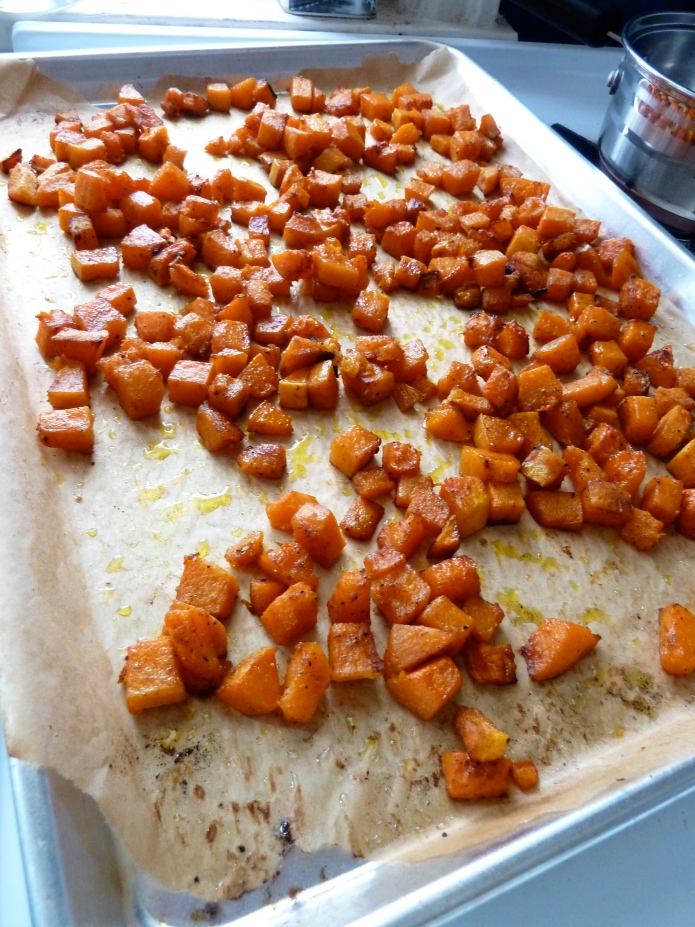
2. Place diced butternut squash on parchment-lined baking sheet and drizzle with olive oil (enough to lightly coat). Mix in cinnamon and salt & pepper to taste. Bake in oven for 30-40 minutes, turning half-way until tender.

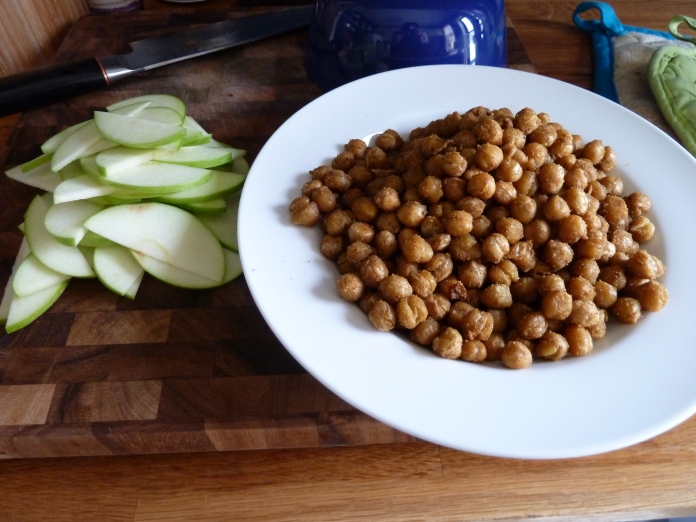
3. Place chickpeas on a large towel and dry by gently rubbing them. Place them on a parchment-lined baking sheet. In a bowl mix together about 1/3 cup olive oil, cumin, garlic salt, and pepper. Pour over the chickpeas and evenly coat. Bake chickpeas for 30-40 minutes until crispy, stirring half-way.

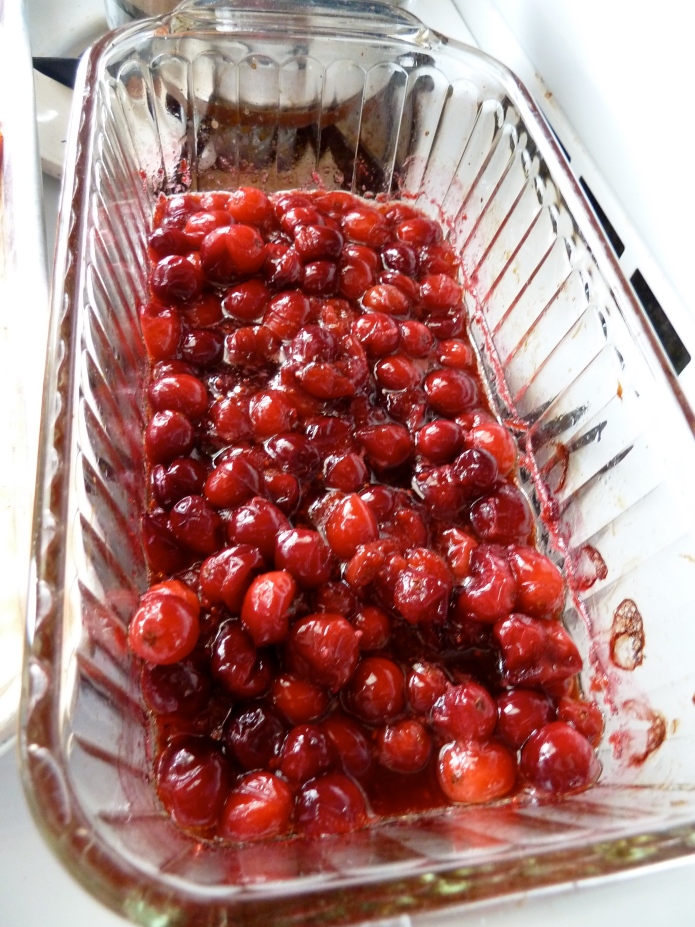
4. Meanwhile, place the cranberries in a small baking dish and lightly drizzle with olive oil. Mix in about 2 Tbs each of balsamic vinegar and maple syrup and a pinch of salt & pepper. Bake in the 425 degree oven for about 30 minutes, stirring halfway.

5. While everything is baking prepare the dressing. Mix all the ingredients in a mason jar and set aside. Feel free to add more maple syrup if you prefer more sweetness or more balsamic vinegar for tang.

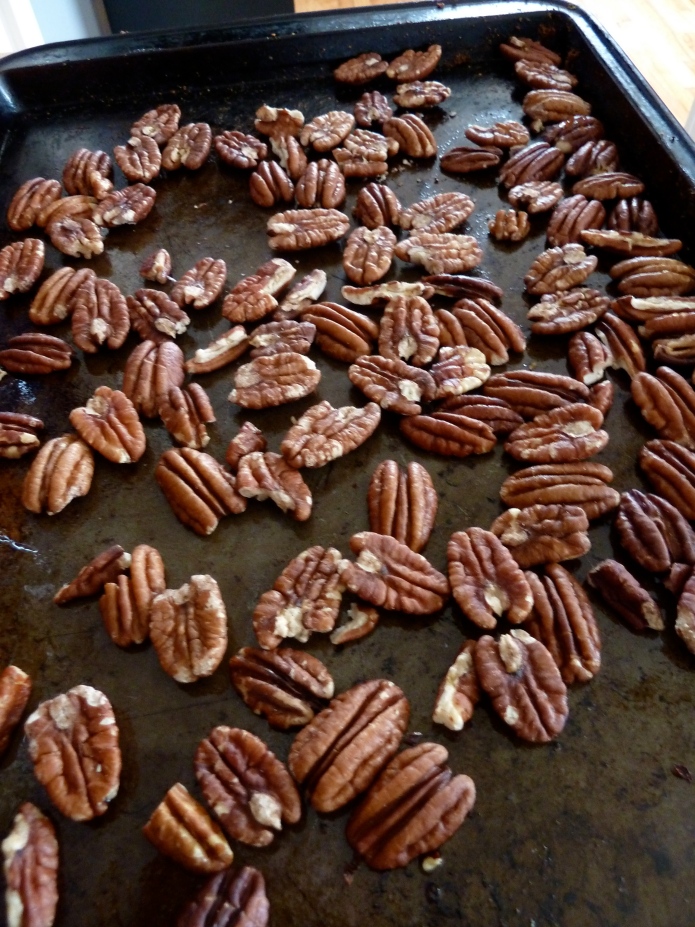
6. Once everything in the oven is done, turn off the heat, and place the pecans on a baking sheet and allow them to toast in the residual heat for about 4-6 minutes (watch closely so they don’t burn). You just want to warm them up until they become fragrant.

7. Assemble the salad: salad greens, chickpea croutons, roasted butternut squash, roasted cranberries, granny smith apple slices, pecans, and a drizzle of the maple dressing.

I have been craving a salad after overindulging over the holidays. I knew I wanted a winter vegetable spin on it, so I thought some cinnamon roasted butternut squash would be wonderful. I had some leftover cranberries in the freezer from the Farmer’s Market, so I thought I would try roasting them instead of using my usual dried cranberries in a salad. I didn’t really know how they would turn out since I have never roasted cranberries, but they were a pleasant surprise. Once they started to burst they created a beautiful thick cranberry sauce and the maple syrup helped to balance out the tartness. I still wanted the tart flavor in the salad to balance the sweet dressing, so I only wanted a little sweetness in the cranberries. I am obsessed with making chickpea croutons in salads because they are so good! I have a hard time not eating too many right off the baking sheet when they are done. I didn’t measure when I was making the dressing, so the measurements are estimates. Play around with it and find the right level of sweetness or tartness you prefer. The salad does take a little bit of time in the oven, so this might be better on a weekend, but it’s relatively easy to prepare.  

Standard
Gluten-free, Main Entrees

Tomato Lentils with Fried Egg

P1040663

Serves 4-6

Inspired by Food Network

Ingredients
1-2 Tbs ghee

1 onion, thinly sliced

2 carrots, thinly sliced

6 sprigs fresh thyme, removed from stem

1/2 cup red wine vinegar

1/2 cup filtered water

3 tsp maple syrup, preferably grade B

2 14 -ounce can diced fire-roasted tomatoes

2 15 -ounce can brown lentils

4 teaspoons dijon mustard

1-2 cups kale or chard, finely chopped

Salt & pepper to taste

1/2 cup fresh cilantro, chopped

4-6 large eggs (*egg per person)

4-6 Pita bread (*omit if gluten intolerant or substitute)

Directions

1. Melt ghee in a large heavy bottom pan over medium-high heat. Add in the onions and cook until charred and tender, stirring occasionally and adding in more ghee if needed (about 8-10 minutes).

2. Next, sauté the carrots at medium heat for about 5 minutes until slightly tender. Also, add in fresh thyme and season with salt & pepper.

3. Add in red wine vinegar, water, and maple syrup and cook until almost evaporated, about 5 minutes.

4. Add the tomatoes and increase the heat to high; cook, stirring, 3 minutes.

5. Add the lentils and 2 cups of water. Bring to a simmer, then reduce the heat to medium and cook until the lentils are soft, about 10 minutes.

6. Stir in the dijon mustard and kale/chard and cook 5 more minutes. Season with salt and pepper.

7. Meanwhile, in a separate pan, fry eggs to personal preference.

8. Warm the pita bread in the pan until soft and tender.

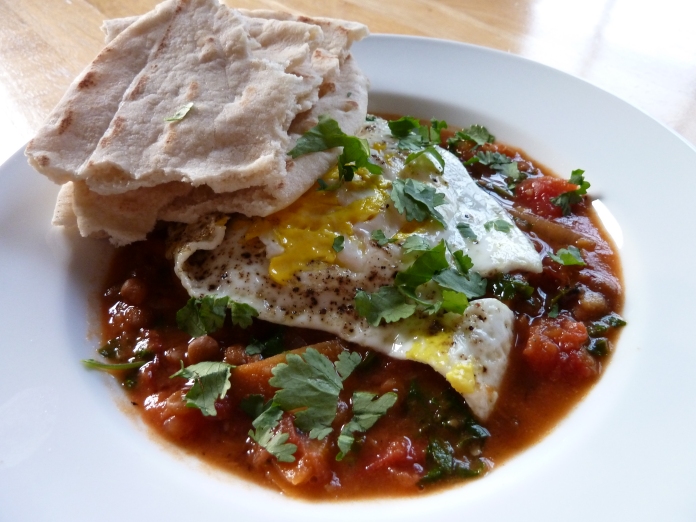
9. Serve by spooning the lentils into a bowl, top with fried egg, garnish with cilantro, and place pita bread on the side.

I have been making this recipe for a few years now, so I thought I would add it to the blog. I first found this recipe in a Food Network magazine and I liked the concept of the fire-roasted tomatoes with lentils and a fried egg. I am always trying to find more ways to eat lentils because they are so good for you and I thought this recipe had a great foundation to work from. The first time I made the recipe I changed a few ingredients to make it more nutritious, but I didn’t think it made enough for our leftover work lunches, so I decided to double it. After my nutritious add-ins like carrots, onions, kale/chard, and cilantro the recipe was starting to not resemble much of the original. I also substituted maple syrup for the sugar. I decided not to add in the celery and use cilantro (my fav) instead of parsley. The original recipe also had you cook the eggs in the lentils, but I preferred to cook them on the side because that way my boyfriend and I could have our eggs cooked the way we prefer (he likes runny & and I like hard, but I am trying to like runny since it’s better for you and your brain). The warm pita served on the side adds in the perfect comfort food element that you desire during these chilly months. Another great thing about this meal is that it is relatively quick to make, so it’s a perfect weeknight dinner. 

Standard
Gluten-free, Main Entrees, Salad, Vegan

Buffalo Cauliflower Salad

P1040808


Serves 4

Ingredients

8 cups Romaine lettuce, chopped

1 cup raw Sunflower Seeds

2 Avocados, diced

1 can Kidney Beans, drained & rinsed

1 can Black Olives, drained & rinsed


Buffalo Cauliflower   (Slightly adapted from Mind, Body, Green.com)

1 large head of Cauliflower, cut into florets

3/4 cup Garbanzo Bean Flour

3/4 cup filtered water

2 tsp Garlic Powder

Buffalo Sauce

2/3 cup Hot sauce (preferably Cholula)

1 tsp ghee (*optional to use vegan butter if you prefer)


Dressing

1/2-3/4 cup vegan mayo (new favorite is Just Mayo)

2 Tbs Apple Cider Vinegar (*varies to taste and desired consistency)

(*Optional to add blue cheese, but you don’t miss it)

Directions

1. Preheat oven to 450 degrees and line 2 baking sheets with parchment paper.

2. Prepare cauliflower batter by whisking together in a large bowl garbanzo bean flour, water, and garlic powder. Add cauliflower florets to the batter and gently toss until coated. Divide the cauliflower between the 2 baking sheets and bake for 15 minutes, turning halfway.

3. Meanwhile, prepare the buffalo sauce by melting the ghee in a saucepan over medium low heat and then whisk in the hot sauce.

4. Coat the cauliflower in the buffalo sauce and bake for another 25-30 minutes, turning halfway, until golden and crispy.

5. Meanwhile, toast the sunflower seeds over low heat until fragrant and lightly toasted.

6. Prepare the dressing by whisking the mayo and apple cider vinegar together. I never measure, so the measurements are estimates. I just add a splash, mix, and taste. Once the dressing is super tangy and thinned out I am  happy. Keep experimenting until you find your desired level of tang. I like a lot because it gets diluted in the salad.

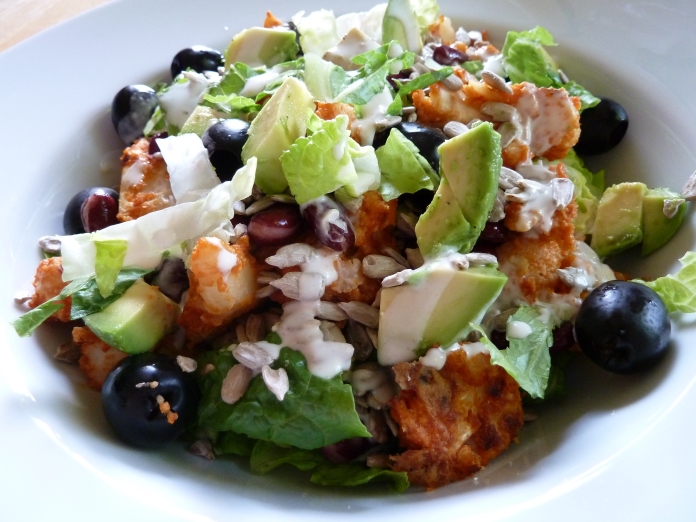
7. Arrange salads between four plates: romaine, cauliflower, kidney beans, olives, avocado, sunflower seeds, and dressing.


When I came across the Buffalo Cauliflower recipe from Mindbodygreen.com I knew it was going to be amazing! I made the recipe a few times as an appetizer or side dish, but I wanted to find a way to turn it into a meal. So of course, I thought a salad would be great. I altered the batter recipe because it made too much and it just pooled at the bottom of the baking sheet. But that’s not so bad because it bakes up into another delicious snack (crispy batter) that my boyfriend loves to snack on. Feel free to add whatever salad toppings you prefer. Lately I have been obsessed with toasted sunflower seeds because they add a nice crunch and they are so tasty! It is worth the extra step of toasting them. I hope you enjoy this! 


Standard
Main Entrees, Vegan

Sweet & Sour Tofu over Quinoa

P1040232


Serves 4

Ingredients

2 cups quinoa, rinsed & drained (rinsing removes bitter flavor)

4 1/4 cups filtered water

1 Tbs coconut oil

1 block tofu, drained/rinsed/pressed/cut into cubes

3-4 bunches of baby bok choy, ends cut off and stems separated

2 cups snow peas, ends trimmed

1 cup sliced almonds

1/2 cup black sesame seeds

1 cup cilantro, chopped (reserve about 1/8 cup for a garnish)


Sweet & Sour Sauce (Adapted slightly from Vegan Yum Yum)

3 1/2 Tbs rice vinegar

1/4 cup & 1 Tbs filtered water

2 Tbs maple syrup

2 Tbs shoyu (soy sauce)

2 tsp ketchup (preferably Muir Glen brand (tasty and natural))

1 tsp molasses

1/4 tsp ginger powder

1/2 tsp himalayan salt

1 1/2 Tbs cornstarch, plus 2 Tbs filtered water mixed together for a thickener


Directions

1. Prepare quinoa by placing the rinsed quinoa and 4 1/4 cups of water in a large pot, cover, bring to boil, reduce to simmer for 12-15 minutes, and fluff with a fork when done.

2. Meanwhile,  saute the tofu cubes in the coconut oil over medium heat until golden on each side, about 8-10 minutes.

3. Next, add the baby bok choy and saute until tender, about 3-5 minutes. Add in the snow peas the last minute to saute (make sure to not overcook, they are best with a little crunch).

4. Meanwhile, prepare the sweet & sour sauce by adding all the ingredients (besides the cornstarch mixture) in a saucepan over medium heat and whisk occasionally until about to simmer. Then whisk in the cornstarch mixture until the sauce is thickened and then turn off the heat. Don’t leave unattended because it can burn.

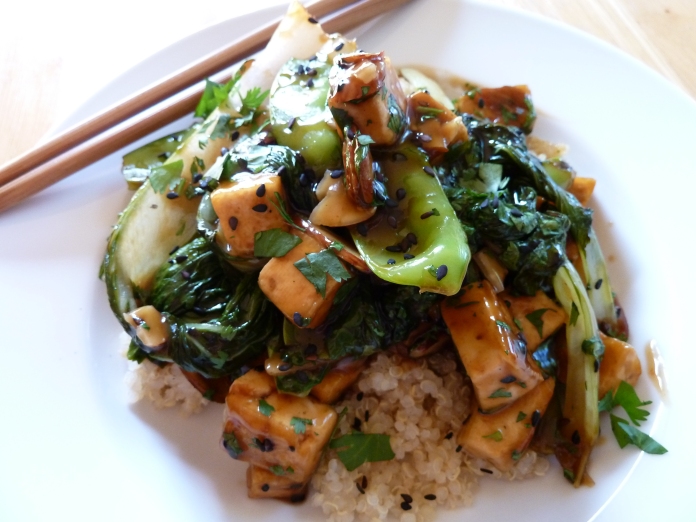
5. Finish everything off by adding the prepared sweet & sour sauce to the cooked tofu and veggies and saute for 1-2 minutes until everything is coated in sauce. Turn off the heat and mix in the black sesame seeds, sliced almonds, and cilantro. Serve over the quinoa and garnish with more cilantro and black sesame seeds.


I have been making this sweet & sour sauce from Vegan Yum Yum for years and I love it every time! So I thought it was about time to preserve the recipe on the blog. The flavors are so amazing because it’s salty and sweet, so your mouth never gets bored. The other great thing about the sauce is that you probably already have the ingredients in your pantry, so you can whip it up anytime. This sauce would be good on any veggies, protein, and grain combo, so feel free to be creative because you can’t really go wrong. The original recipe was made with broccoli and it was amazing, so I suggest trying it that way as well.  I made some adaptations like using maple syrup instead of sugar, which I usually do, and I used less of it. I also decided to use shoyu instead of tamari because I like the flavor better, but if you are gluten intolerant you would want to stick with the tamari. Enjoy!


Standard
Gluten-free, Main Entrees, Salad, Vegan

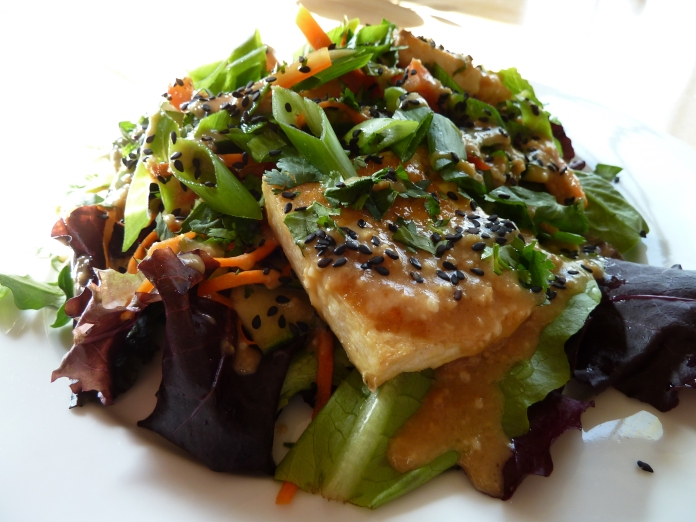
Sesame-Miso Salad with Pickled Veggies + Crispy Broiled Tofu

P1040745


Serves 4

Ingredients

8 cups mixed salad greens

2 carrots, peeled with julienne peeler (or thinly sliced)

1 red pepper, julienned

1 cucumber, thinly sliced into strips

3 green onions, whites thinly sliced and green tops cut on a bias (reserve green tops for garnish)

1/2 cup black sesame seeds

1 cup cilantro, chopped (garnish)

1 block tofu, pressed for 15-30 minutes & sliced into 1/2 inch squares

1-2 Tbs toasted sesame oil


Pickling Marinade

1/2 cup rice vinegar

1 tsp coconut sugar (or maple syrup)

1 tsp toasted sesame oil

1 tsp shoyu (soy sauce)

1/2 tsp himalayan salt, freshly ground


Miso-Sesame Dressing

1/2 cup miso paste (mild)

3-4 Tbs toasted sesame oil (depending on how strong you want the sesame flavor)

2 Tbs maple syrup

1 Tbs shoyu

1/4-1/2 cup rice vinegar (depending on how tart you want it)

1/4 cup filtered water (for thinning out the dressing)


Directions

1. Press tofu by wrapping in a towel, place in a bowl, and top with 2 canned goods (weights). Allow the water to press out for 15-30 minutes.

2. Wash salad greens, spin dry, and set to the side.

3. In a large bowl, whisk together pickling marinade ingredients. Add veggies into the bowl as you chop them and allow them to marinade at least 20-30 minutes (mix every now and then). Add 1/4 cup of black sesame seeds to the bowl and mix well.

4. Whisk together miso-sesame ingredients.

5. Preheat the broiler. Lightly coat a baking sheet with toasted sesame oil. Place the tofu squares on the baking sheet and coat each side with the toasted sesame oil. Broil for about 5 minutes in each side, depending on how hot your broiler gets. Watch carefully because they can overcook fast. Aim to get a golden crust on each side. When the last side is golden, spoon a tsp of the miso-sesame dressing on top of each tofu square and broil for another 1-2 minutes. Sprinkle with black sesame seeds.

6. Assemble salad by filling each plate with 2 cups of salad greens, top with pickled veggies and tofu squares, and garnish with green onion tops, cilantro, and black sesame seeds.


I was craving something light and healthy after not eating the best lately, so I came up with this recipe. I was inspired by a tofu dengaku appetizer I had recently at a wonderful Japanese restaurant. I always love how I feel healthier after eating Japanese food and I try to incorporate their recipes into my own cooking. You can use your own palette to tweak the miso-sesame dressing. I didn’t measure anything, so my recipe is just an estimate. I would continue to whisk, taste, and add more ingredients based on what flavors I wanted to stand out. So hopefully my estimates render a quality dressing. I felt I should have waited on posting this recipe until I made it again so I could make sure the measurements were accurate, but I couldn’t wait to share it and I wanted to write it down before I forgot. If you are short in time you don’t have to pickle the veggies, but I think it is worth it. If you start with the veggies they are sitting around anyways while you prepare the rest of the recipe so they might as well be marinading. You don’t have to have coconut sugar for the marinade, but it may be worth trying since it has a lower glycemic index compared to regular sugar. This was my first time broiling tofu and I think this will be my preferred method moving forward. It was quick and I have never had such crispy tofu unless it is fried and this is a much healthier way. 


Standard
Gluten-free, Main Entrees, Salad, Sides, Vegan

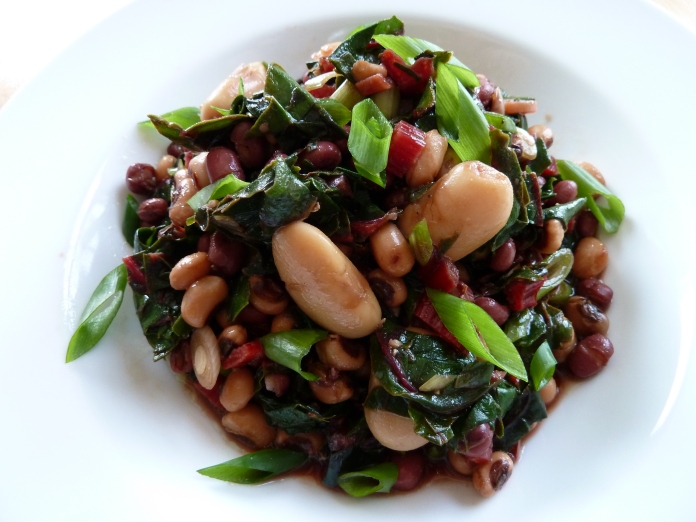
Three Bean Salad with Sautéed Chard

P1040563

P1040548

Recipe Adapted from Goop.com

Serves 5-6 as main course

Ingredients

1 can Butter Beans, drained & rinsed

1 can Aduki Beans, drained & rinsed

2 cans Black-eyed Peas, drained & rinsed

1 large bunch Rainbow Chard, stems finely diced & leaves chopped

1/2 Tbs olive oil

4 garlic cloves, minced

1 lemon

4 Green Onions, sliced on a bias (set aside some of the sliced green tops for garnishing)

Vinaigrette

1/3-1/2 cup olive oil (depending on whether you are wanting less fat, good both ways)

2/3 cup balsamic vinegar

2 tsp dijon mustard

1/2-1 tsp salt (to taste)

1/2 tsp freshly ground pepper

Directions

1. Prepare vinaigrette by whisking ingredients together in a large bowl (preferably the bowl the dish will be served in so it needs to be large).

2. Mix the beans and green onions into the vinaigrette and set aside to marinate.

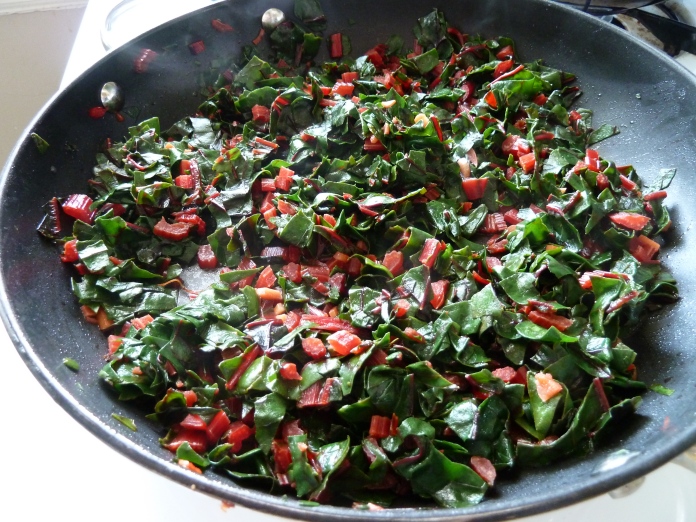
3. Sauté the garlic in the olive oil over medium low heat for about 30 seconds. Add in the chard stems and continue to sauté for 2-4 minutes, until starting to get tender. Next, add in the chard greens and sauté until wilted, about 1-2 minutes. Be careful to not overcook the greens. Finish the chard by squeezing fresh lemon juice over the top and mixing the juice in (the lemon juice is a crucial step to get the best flavor).

4. Finally, mix the sautéed chard into the marinating beans. You can serve immediately or allow to marinate longer for better flavor. Garnish with the green onion tops.

This is an amazing delicious recipe that’s perfect for when you are trying to clean up a bad diet. The combination of the varying beans are comforting, especially the butter beans. The vinaigrette makes the whole dish come together with the lovely pairing of balsamic and dijon. The fresh squeeze of lemon juice on the chard made me realize that chard can actually taste good and that it’s not just something you try to hide in a recipe because you know it’s good for you. It’s the perfect meal for someone trying to avoid gluten and dairy because you get your proteins and veggies all in one dish. This would be a good detox meal that would actually give you nutrients and fill you up. You can also feel great that you are getting some great nutrients from the beans like magnesium, which is so important for healthy mental health, especially during the lull of the winter. 

I changed up the recipe by subbing in my favorite butter beans for northern white beans, added an extra can of black-eyed peas so I would have more to enjoy, doubled the vinaigrette for more flavor, more than tripled the amount of chard for extra nutrition, added all the chard stems, and added more garlic & green onions=flavor. I decided to exclude the parsley because I am not a huge fan. 

This recipe travels well and stays fresh for several days. Perfect to pack in your lunch or for a potluck. Enjoy!

Standard
Breakfast, Main Entrees

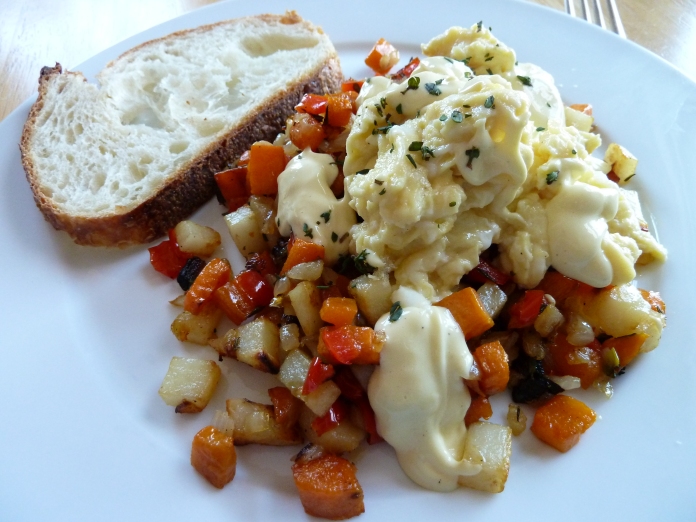
Root Vegetable Breakfast Hash with Hollandaise

P1040492

P1040486 P1040489

Serves 3-4

Ingredients

Hash

1 sweet yellow onion, diced

1 red pepper, diced

1 sweet potato, diced

2 medium sized baby red potatoes, diced

1/4 cup olive oil

1 1/2 Tbs fresh thyme, leaves removed from stems and chopped

1 Tbs garlic powder

1/2 tsp himalayan salt

1/2 tsp freshly cracked pepper

Julia Child’s Hollandaise Sauce  (Makes extra sauce) From “Mastering the Art of French Cooking”

3 egg yolks (reserve egg whites for scrambled eggs)

1 Tbs fresh lemon juice

1/4 tsp himalayan salt

1/8 tsp freshly cracked pepper

1 stick of unsalted butter, melted

Scrambled Eggs

3 whole eggs & remaining egg whites from the sauce

1 tsp garlic powder

1/4 tsp himalayan salt

1/4 tsp freshly cracked pepper

1/2 tsp ghee or olive oil

1/2 tsp fresh thyme (garnish), leaves removed from stems and chopped

Directions

1. Preheat oven 425 degrees.

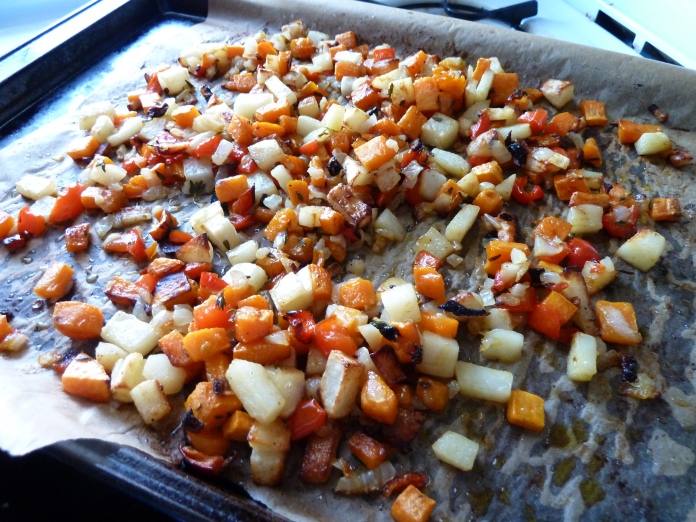
2. Chopped all the vegetables and divide between two parchment-lined baking sheets.

3. In a small bowl, mix together olive oil, fresh thyme, garlic, salt, & pepper and drizzle over the vegetables on the baking sheets. Mix with your hands to make sure they are evenly coated and bake in the oven for 30-35 minutes, turning half-way, until tender and golden.

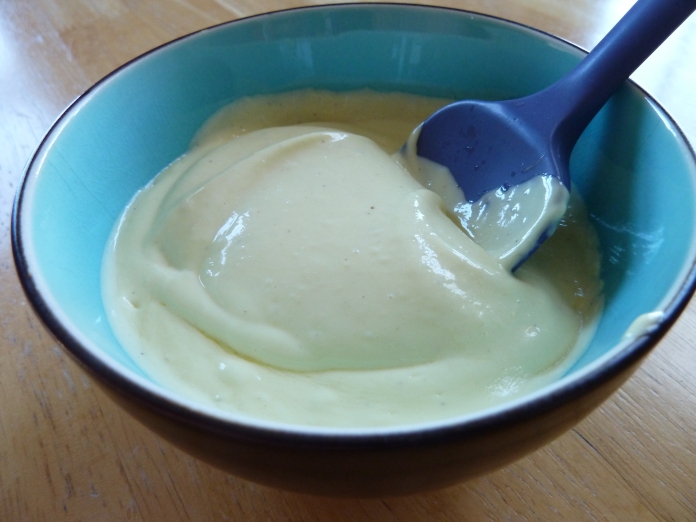
4. While the vegetables are roasting prepare the hollandaise sauce. In a blender add in the egg yolks, lemon juice, salt, & pepper. Have the melted butter in a container with a spout on it for easier use and have a towel available in case it starts to get messy. Place the lid on the blender and take out the center piece so you can drizzle the melted butter in while it is running. Turn the blender on high and begin to add the melted butter by a single drop at a time. It is important that you add the butter slowly or it will not work, so have some patience. Leave the white foam out from the melted butter. After all the butter has been added your sauce should be complete and delicious!

5. Next, prepare the scrambled egg by whisking the eggs with the seasonings. Heat a non-stick pan over medium-low heat and melt some ghee in it. Add the eggs and begin to push the eggs toward the center as they start to set on the bottom. It’s important to cook them slow at a low heat. When they are getting close to being done turn the heat off because the residual heat will cook the rest and you don’t want them overcooked.

6. Assemble by placing about 3/4 cup of vegetable hash on a plate, top with scrambled eggs, drizzle with hollandaise (it’s very rich, so you only need a little), and garnish with fresh thyme.

I made this amazing dish for breakfast this morning and it was so satisfying! My favorite part was the vegetable hash. I could have eaten a large bowl of just the hash. I prefer scrambled eggs, but feel free to top it off with a fried or poached egg. I didn’t want to discard the eggs whites leftover from the hollandaise, so I thought I would add them to the scrambled eggs. You can make more scrambled eggs if you desire or leave out the egg whites. You can also play around with the herbs. I am thinking about trying rosemary next time. The hollandaise sauce is definitely a splurge, but like I said earlier you only need a little bit because it is so rich. I have made Julia Child’s recipe several times and as intimidating as French cooking sounds it was actually pretty easy. Julia wrote in her book that even an 8 year can make this sauce:) You do end up with a good amount of sauce, but then you can find other great dishes to add it to. I know I’ll be making this special recipe the next time I have overnight guests that need a hearty breakfast. 

Standard
Main Entrees, Salad

Brussel Sprout, Apple, & Chickpea Salad

P1040461

Serves 2

Ingredients

6 cups brussel sprouts, shredded with food processor or chopped with knife

1 honey crisp apple, thinly sliced

1/2 cup pecans

1 can chickpeas, drained & rinsed

1/4 cup pumpkin seeds

1/4-1/8 cup smoked blue cheese, crumbled

Dressing

1/2 cup vegenaise (mayo)

2 Tbs apple cider vinegar

1/4 cup smoked blue cheese


Directions

1. Preheat oven 350 degrees.

2. Shred the brussel sprouts with a food processor or thinly slice with a knife.

3. Spread pecans and pumpkin seeds evenly on a baking sheet. Roast in the 350 degree oven for 5-8 minutes. Watch carefully because they can burn easily. Don’t skip this step because it brings out a lot of flavor.

4. Prepare dressing by mixing ingredients together.

5. In a large bowl, mix together brussel sprouts, chickpeas, pecans, pumpkin seeds, and dressing until well combined.

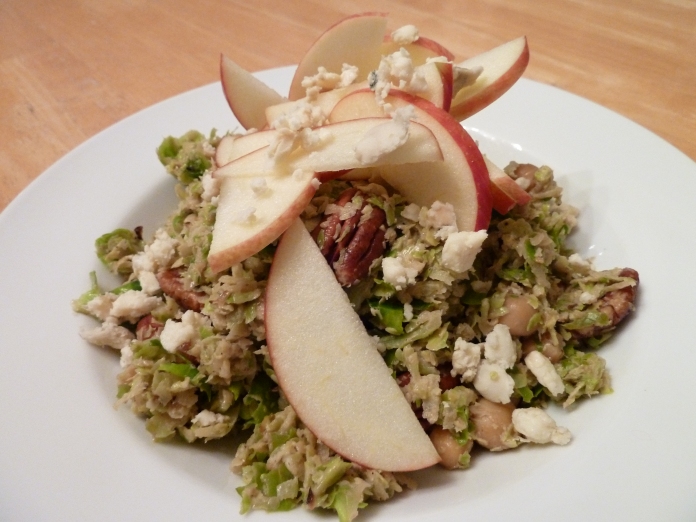
6. Divide the mixture between two plates and garnish with the apple slices and more crumbled smoked blue cheese.


I made this salad several times over fall. I couldn’t get enough of it! I would get the brussel sprouts and apples fresh from the farmer’s market. You couldn’t beat the crunch of a fresh juicy Honey Crisp apple. I found a smoked blue cheese at our local Co-op and the added smoky flavor helped to balance out the intensity of the blue cheese. I would recommend trying a smoked version if you are not a huge fan of blue cheese or you could substitute a cheese you prefer. We have even made it without any blue cheese and it was still amazing and then it would be vegan. We were also huge fans of the roasted pecans because when you roast them they turn into something completely different and amazing! I decided to add a can of chickpeas for protein so we would have a complete meal. This is a relatively easy meal to prepare (if you have a food processor for shredding) and it would be great to serve in a smaller proportion for a starter entree for a dinner party.  


Standard